How to Make Dialogue Videos on iPhone: Layouts for Shorts, Reels and TikTok
Want to explain a rule, act out a customer conversation or create a short scene without filming yourself or recording two voices? In Tau34 AI Studio, you can prepare a dialogue, generate its audio and choose how the speakers and their lines will appear in a video.
Dialogue Studio offers three layouts: Studio, Chat and Split Scene. You can combine them with a color theme and a vertical or horizontal format. This guide walks through those settings using one example: a short conversation about English irregular verbs.
From an AI Writer script to a voiced dialogue
In our example, AI Dialogue Writer wrote a conversation about why swim becomes swam and speak becomes spoke. One character asks questions and the other explains. The script also includes an introduction and a closing line.
For this demonstration, the generated script was left unchanged. We generated the audio, then moved on to the video design. This lets you follow one example from a prepared AI dialogue to a finished video.
If you are starting from scratch, first follow the guide to creating a dialogue with two AI voices. To give the characters roles and a particular way of speaking, see the guide to voice presets and custom instructions.
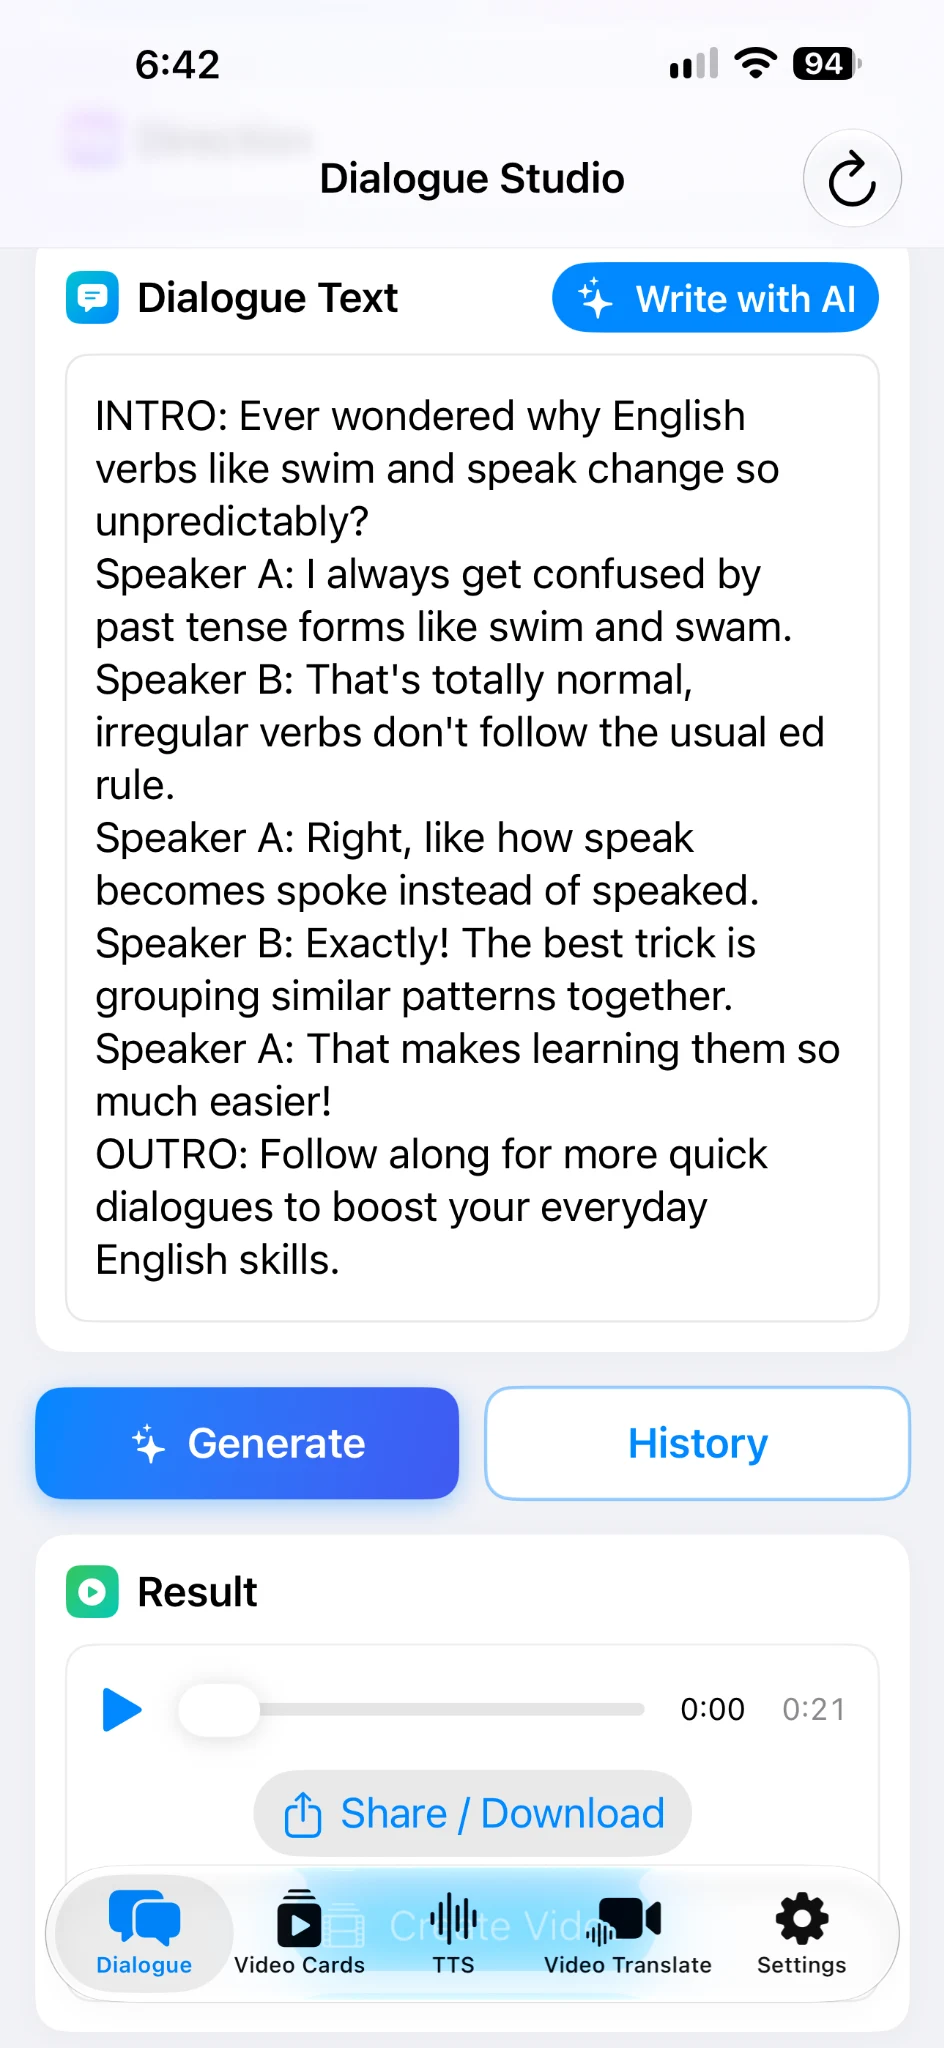
Open Create Video and choose a format
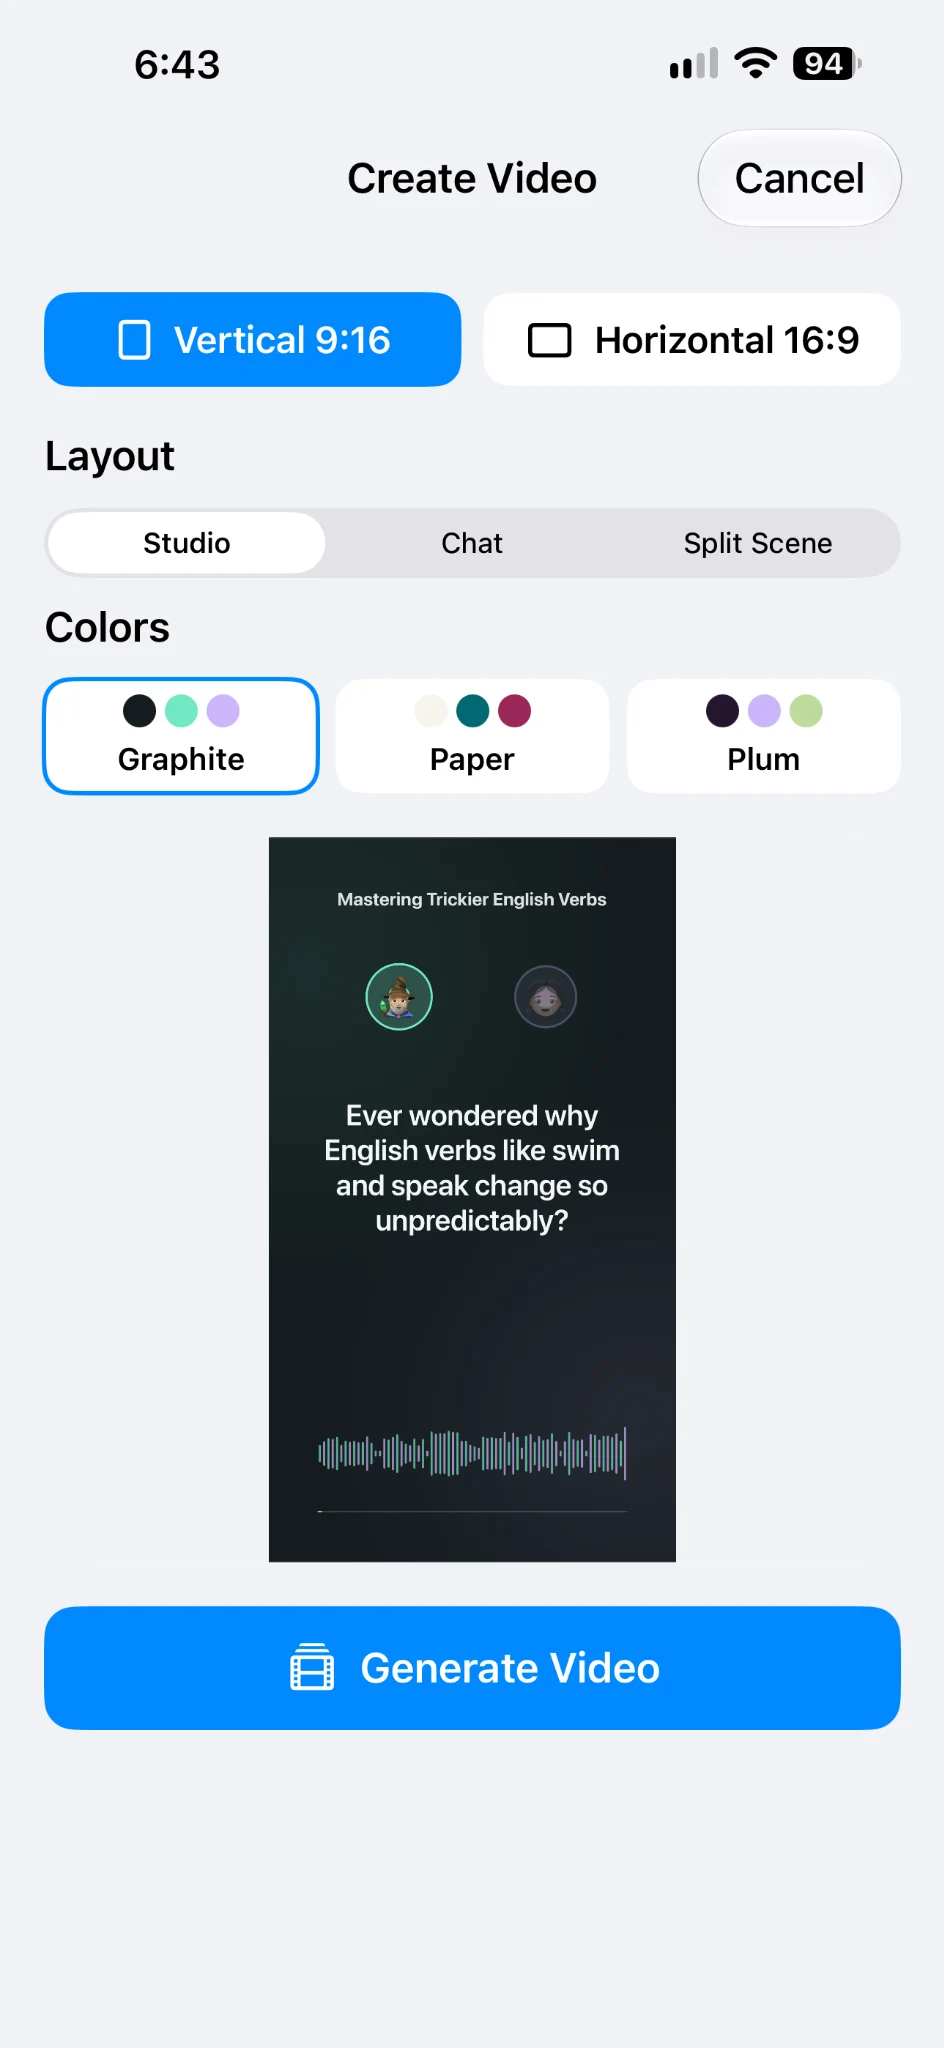
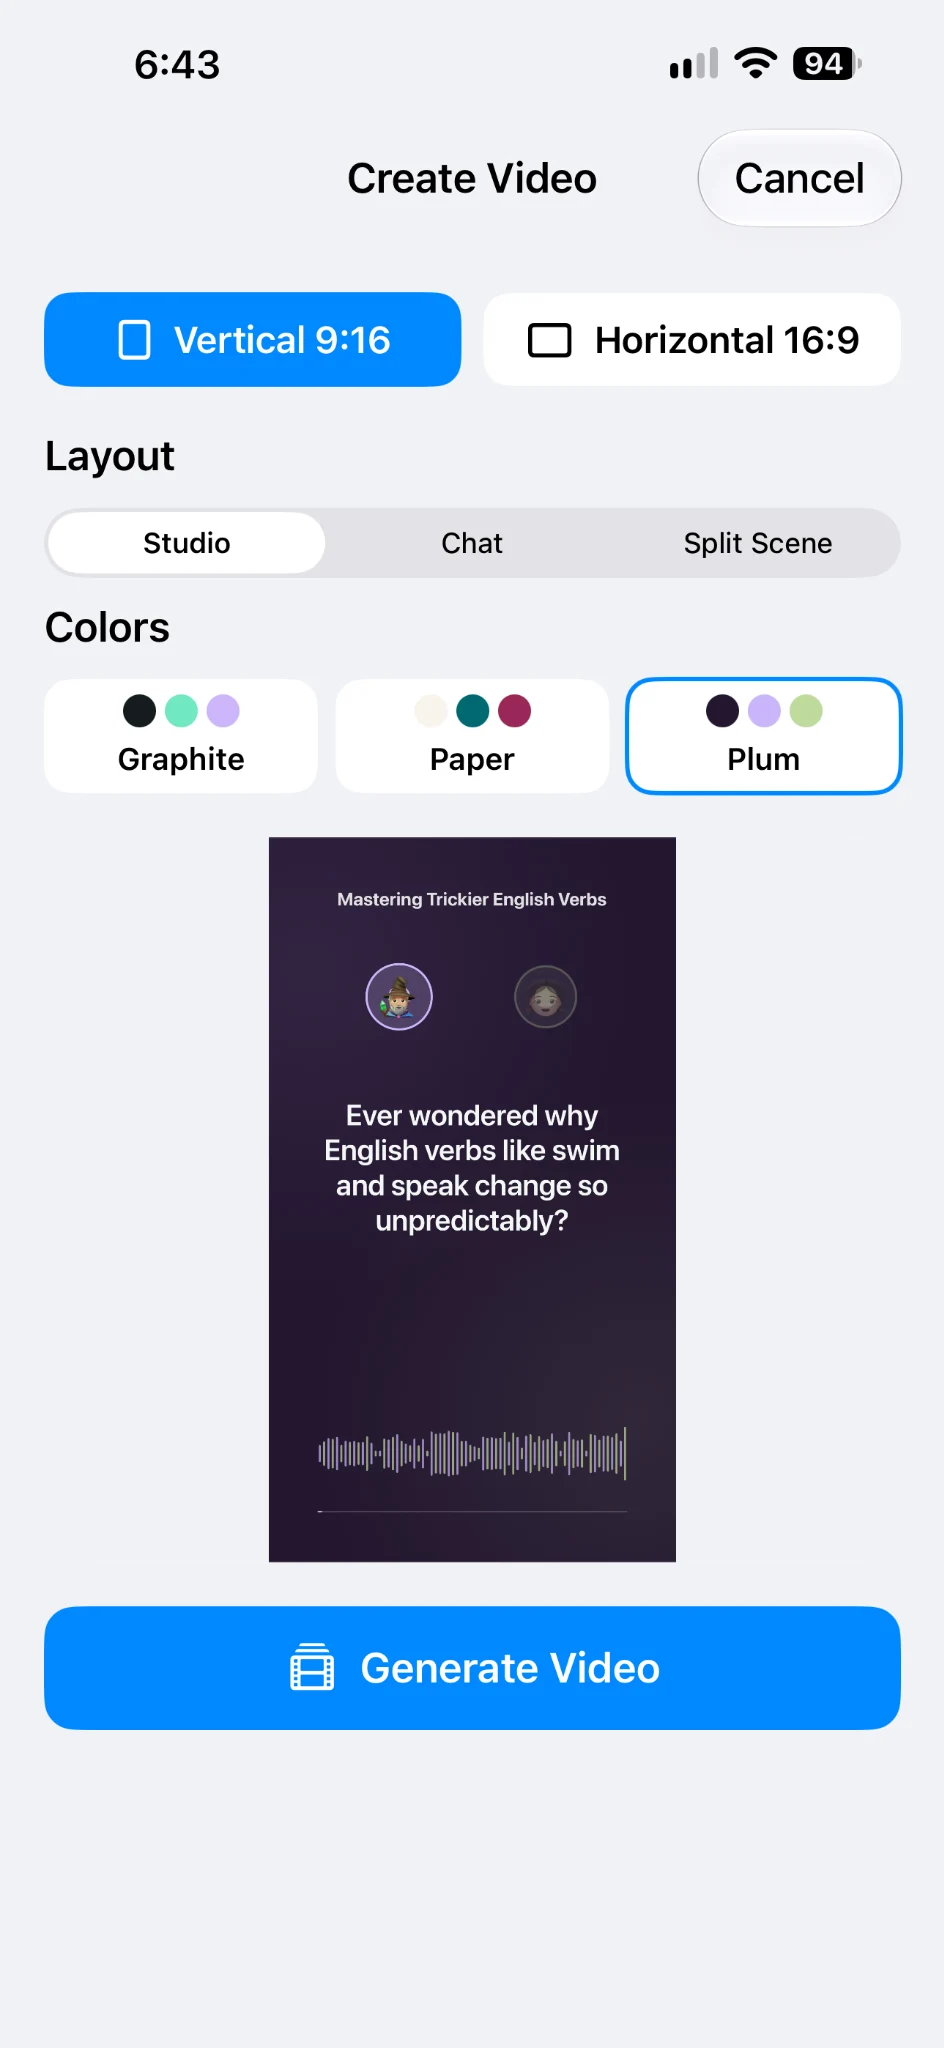
After generating the audio, tap Create Video. The video setup screen offers two formats:
- Vertical 9:16 — a vertical video for Shorts, Reels and TikTok.
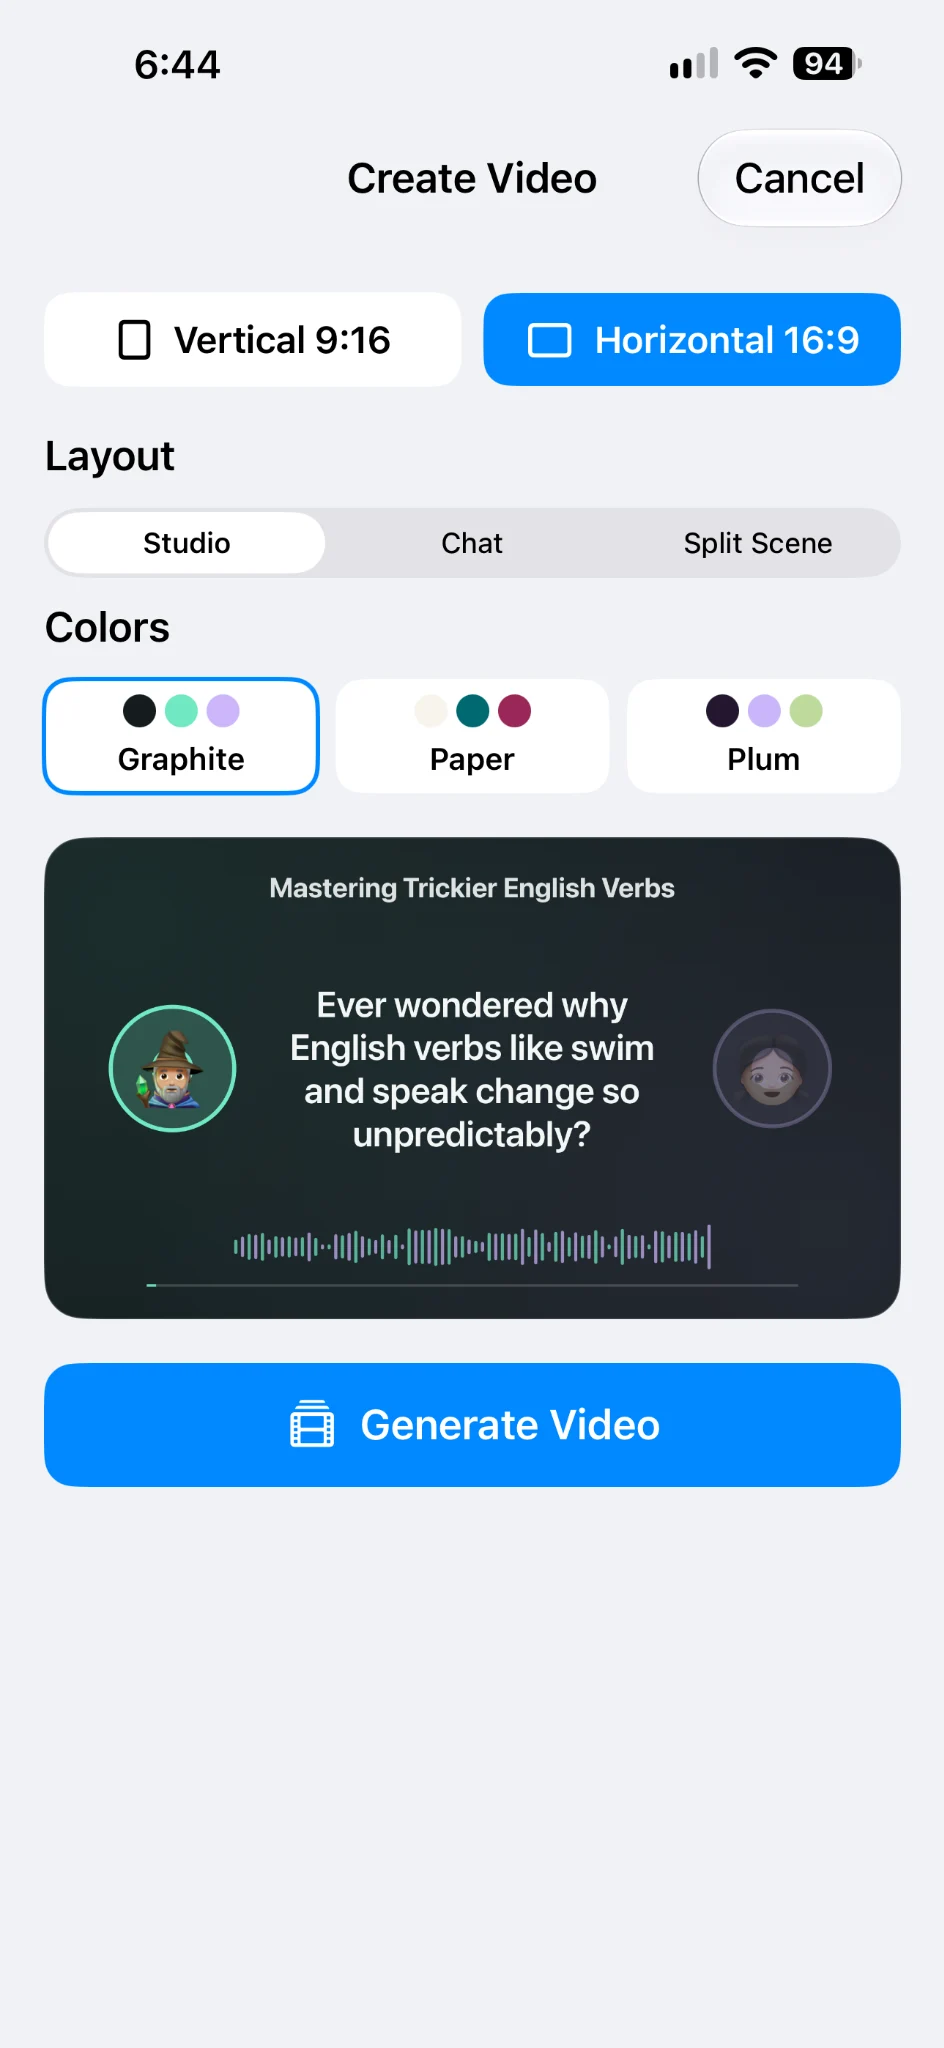
- Horizontal 16:9 — a widescreen video for a regular YouTube upload, a lesson or a presentation.
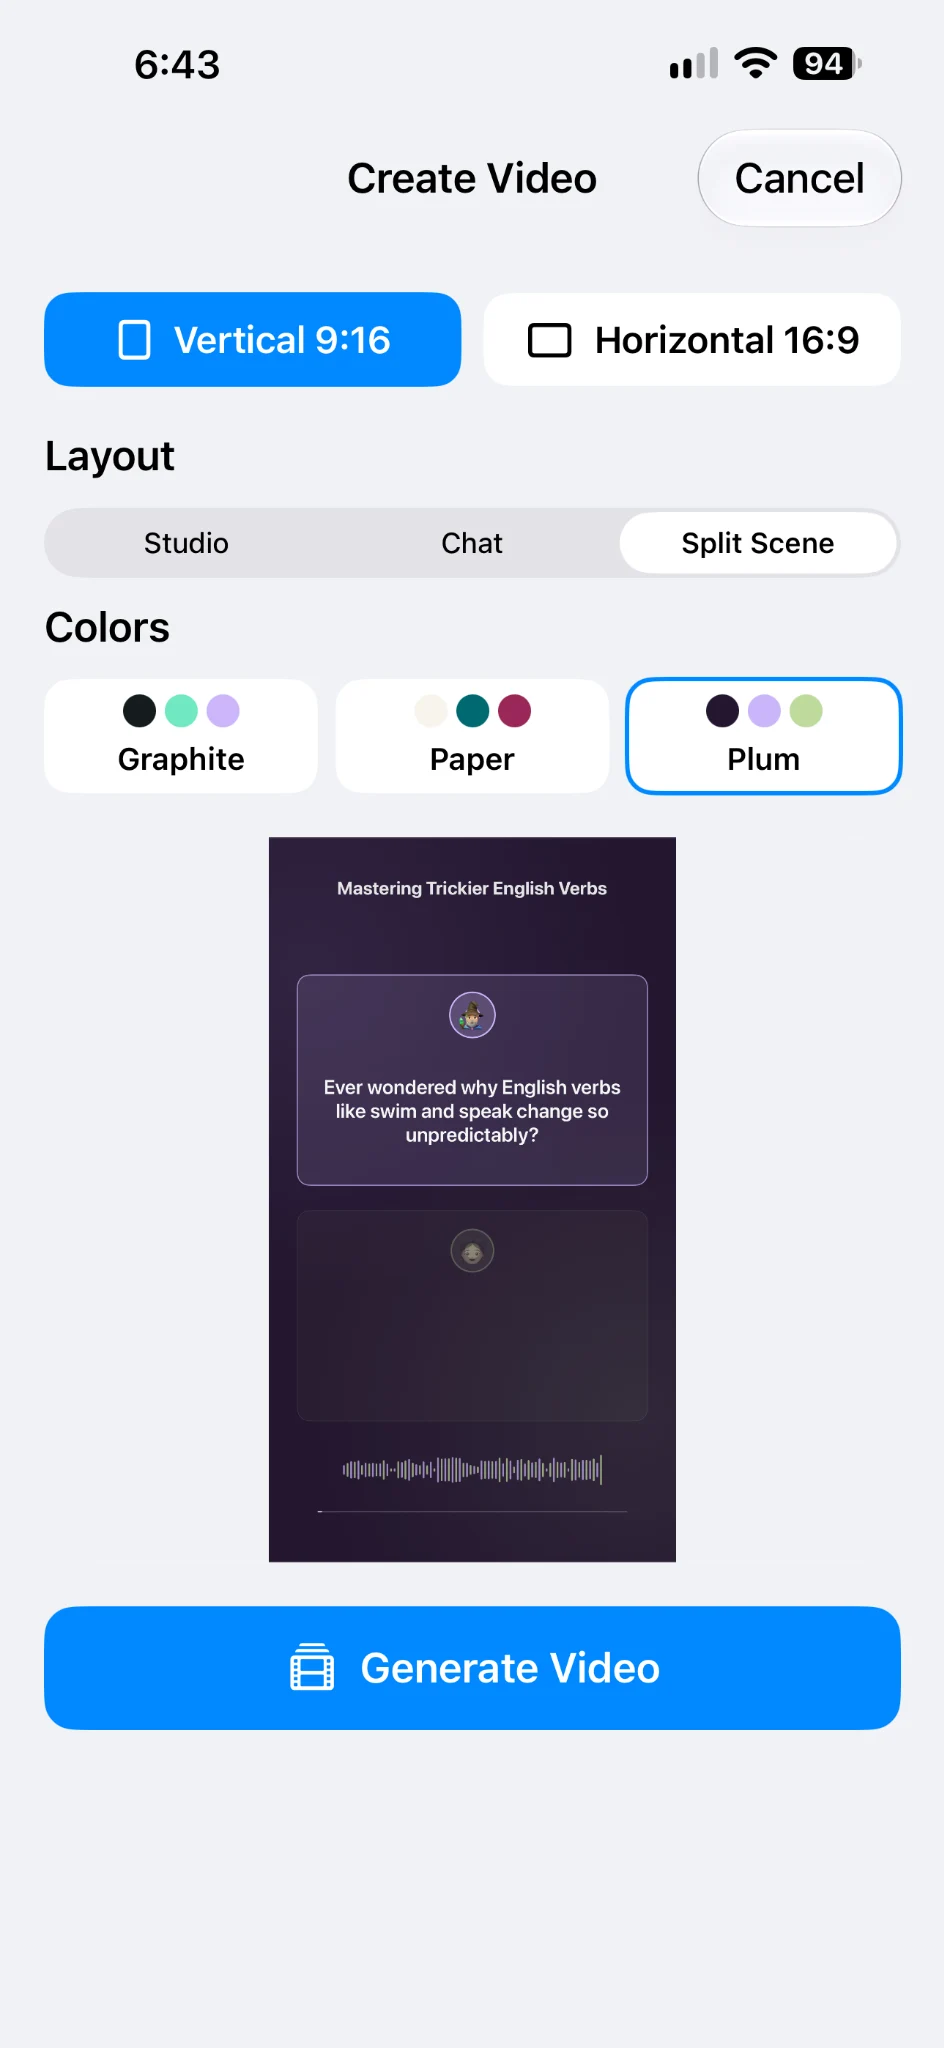
Below them are Layout, which controls the arrangement of the dialogue, and Colors, which controls the color theme. The preview shows how your selected combination looks with your text.
Studio: put the current line in focus
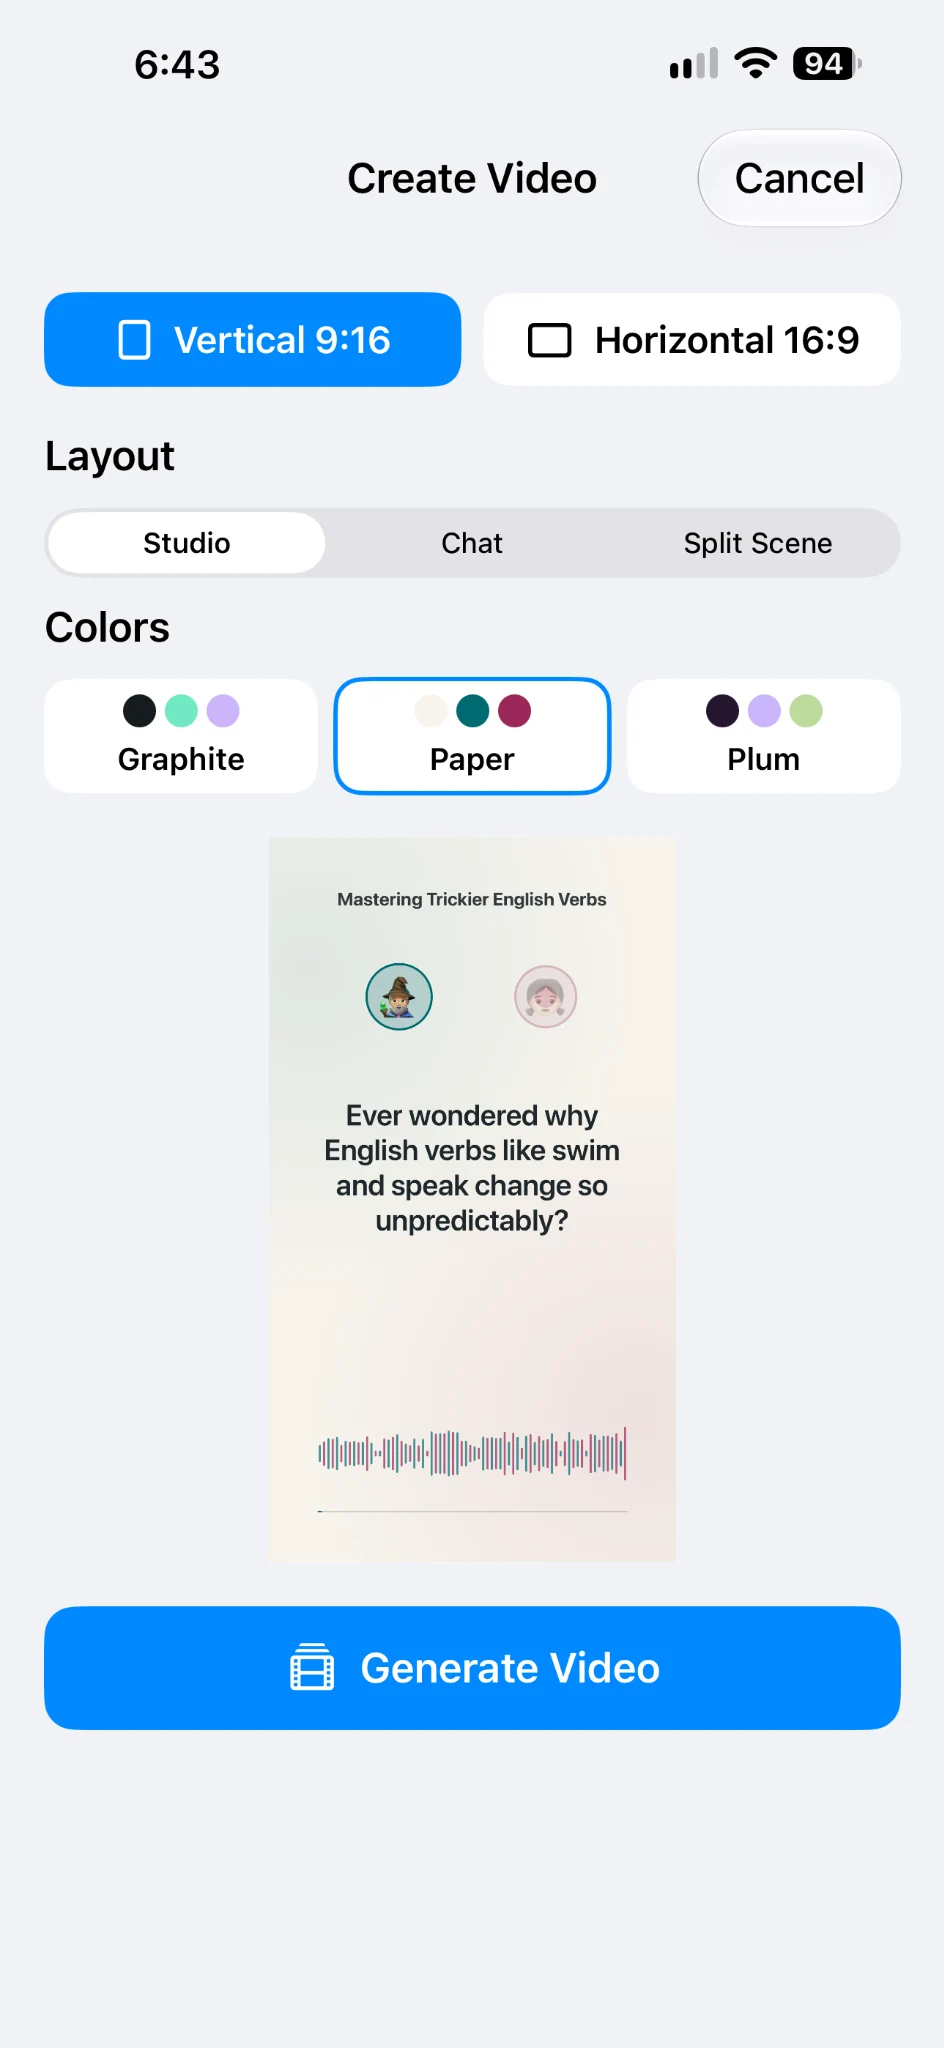
In Studio, speaker portraits accompany large text showing the current line. In the vertical version, the portraits sit above the text; in the horizontal example shown here, they sit on either side. A waveform and progress bar appear near the bottom.
This is a useful starting point for a short explanation, a conversation between two hosts or a question and answer. The spoken line takes center stage.
For example, one speaker can ask why an English verb changes form, while the other explains it using a specific word. That gives you a short conversational lesson.
Chat: present the dialogue as messages
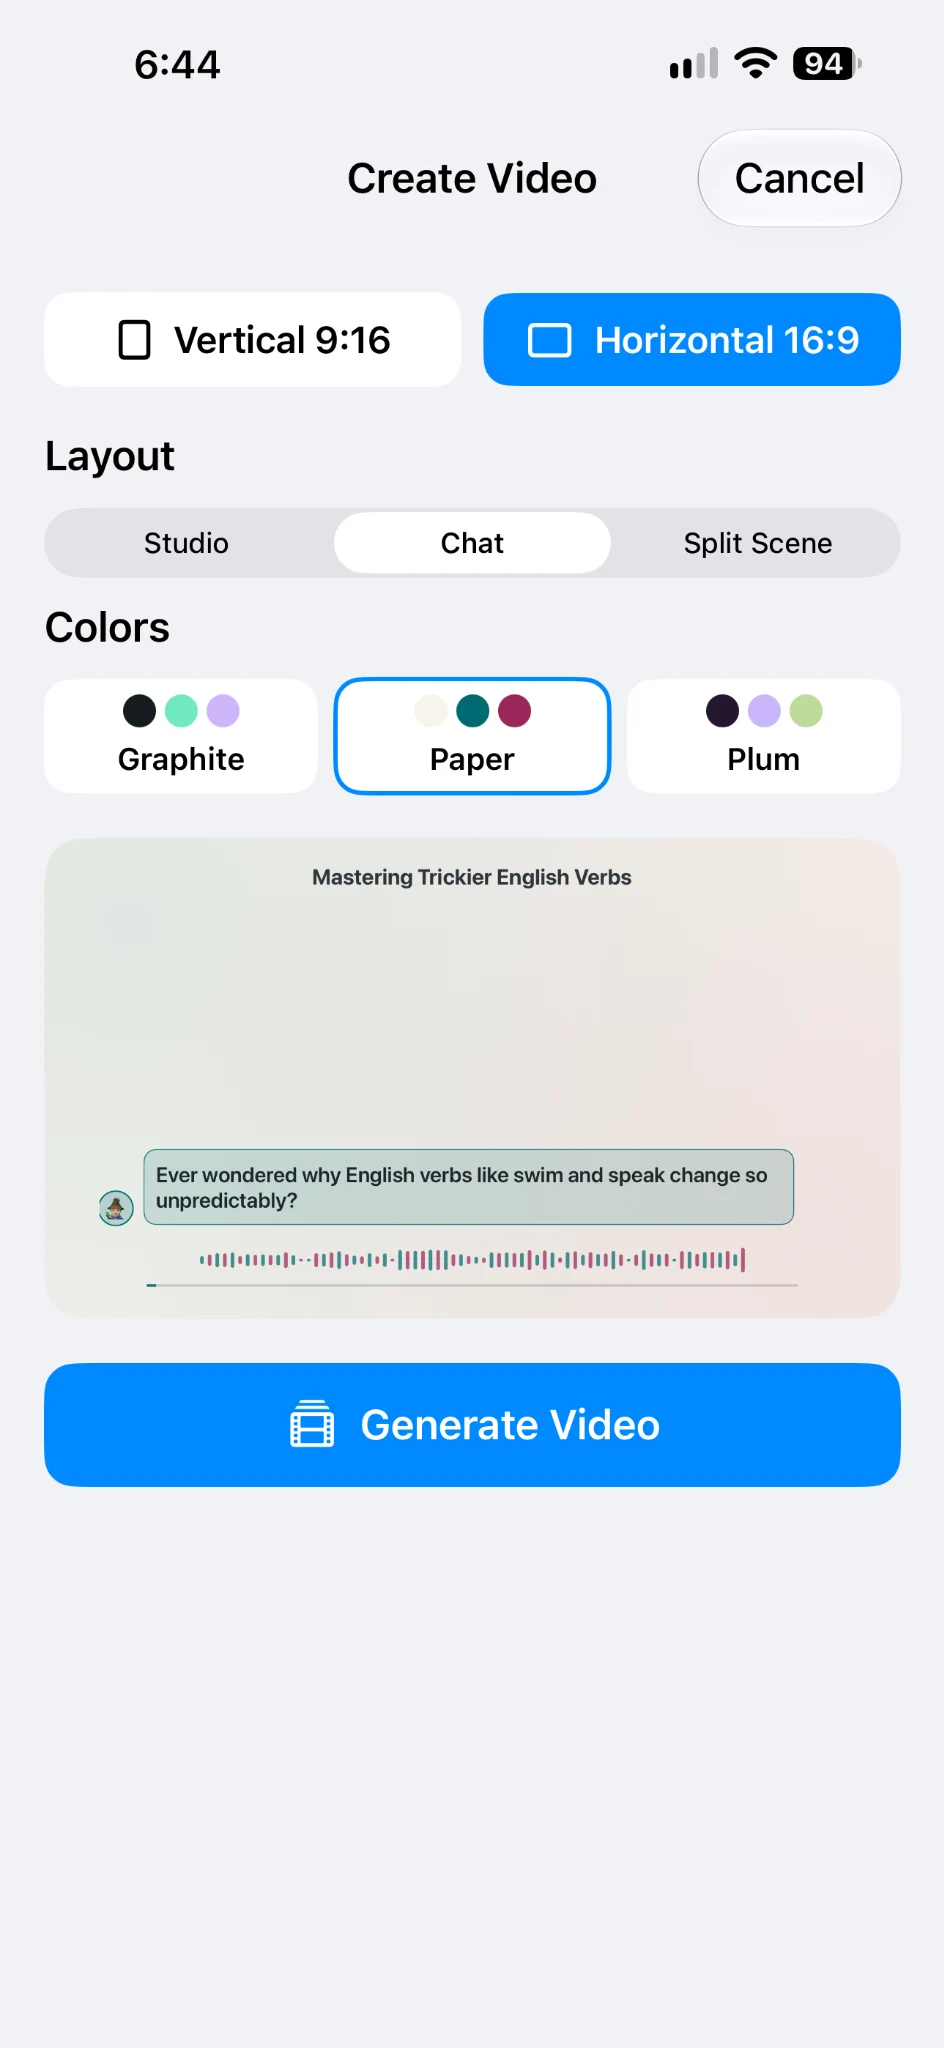
In Chat, a line appears in a message bubble beside a small portrait of the speaker. In the supplied horizontal example, the message is near the bottom of the frame.
You could choose this style for a conversational scene: friends exchanging messages, a customer asking a seller a question or a short everyday conversation. The presentation resembles a message exchange, while your voiced dialogue remains its basis.
Try this layout when the idea revolves around what the characters say to each other.
Split Scene: give each speaker their own space
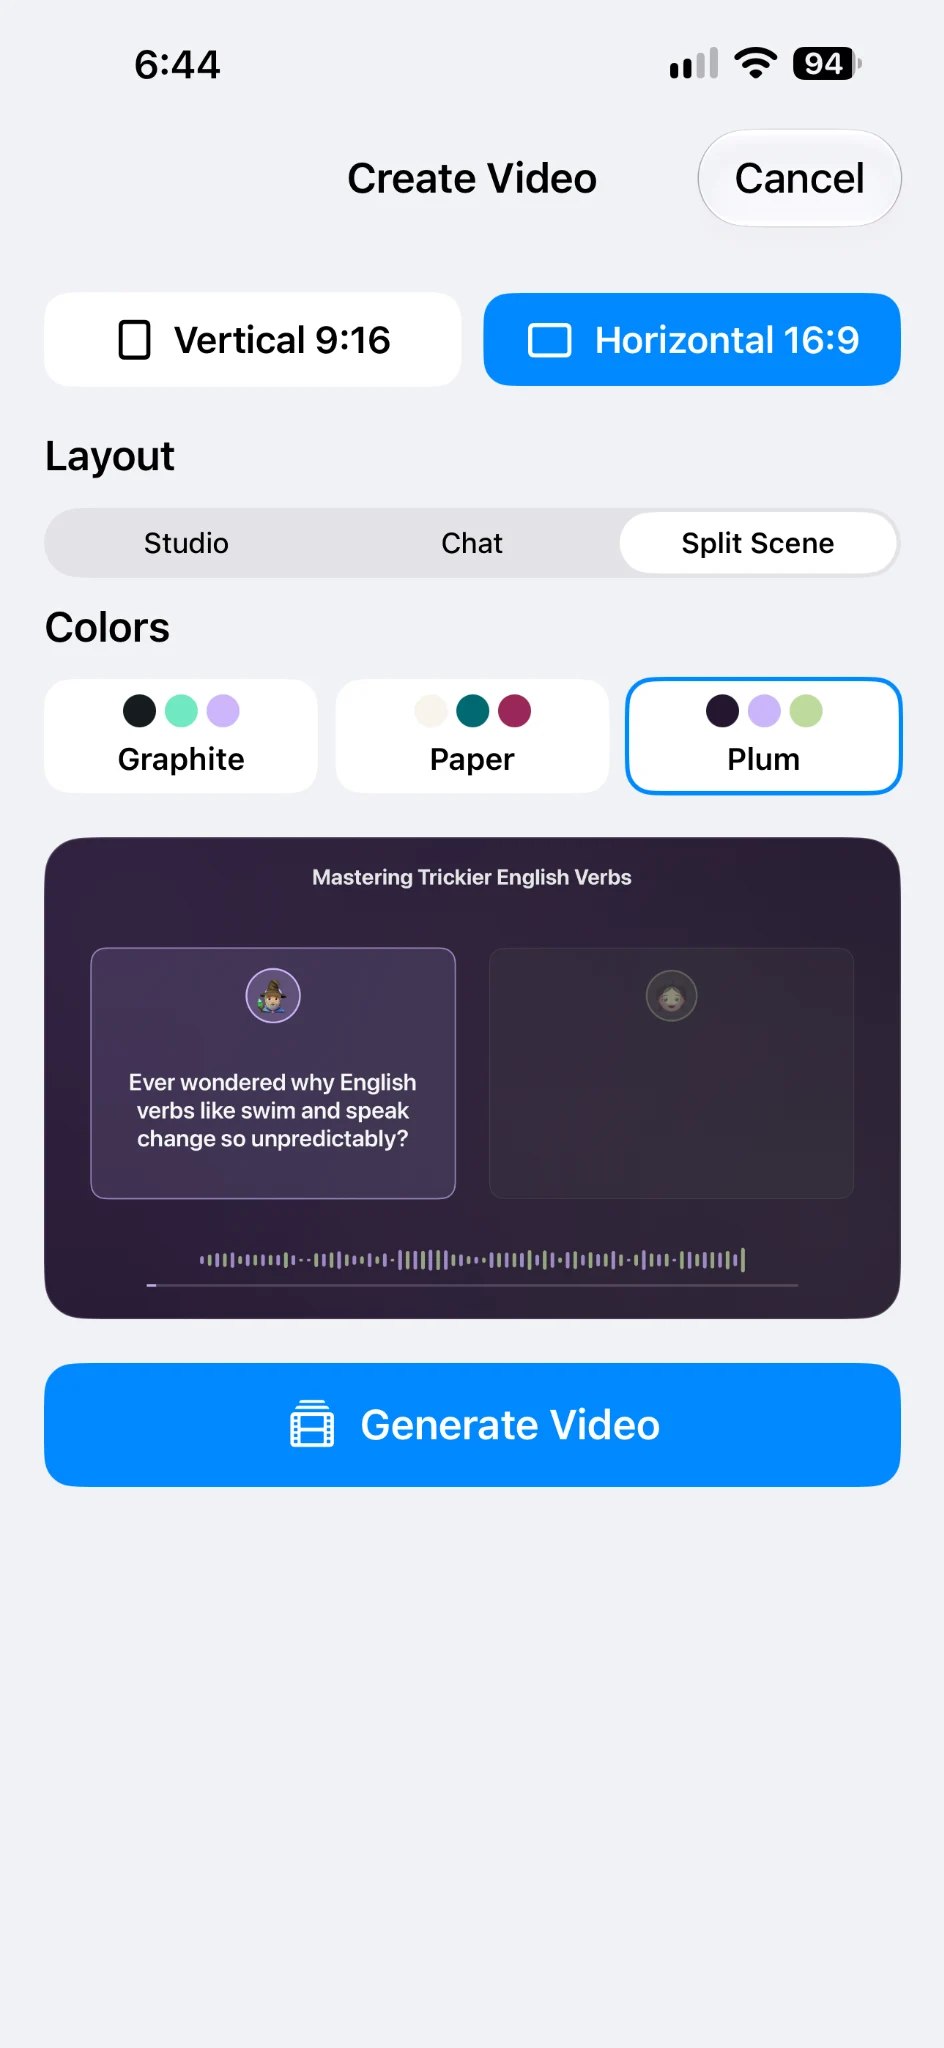
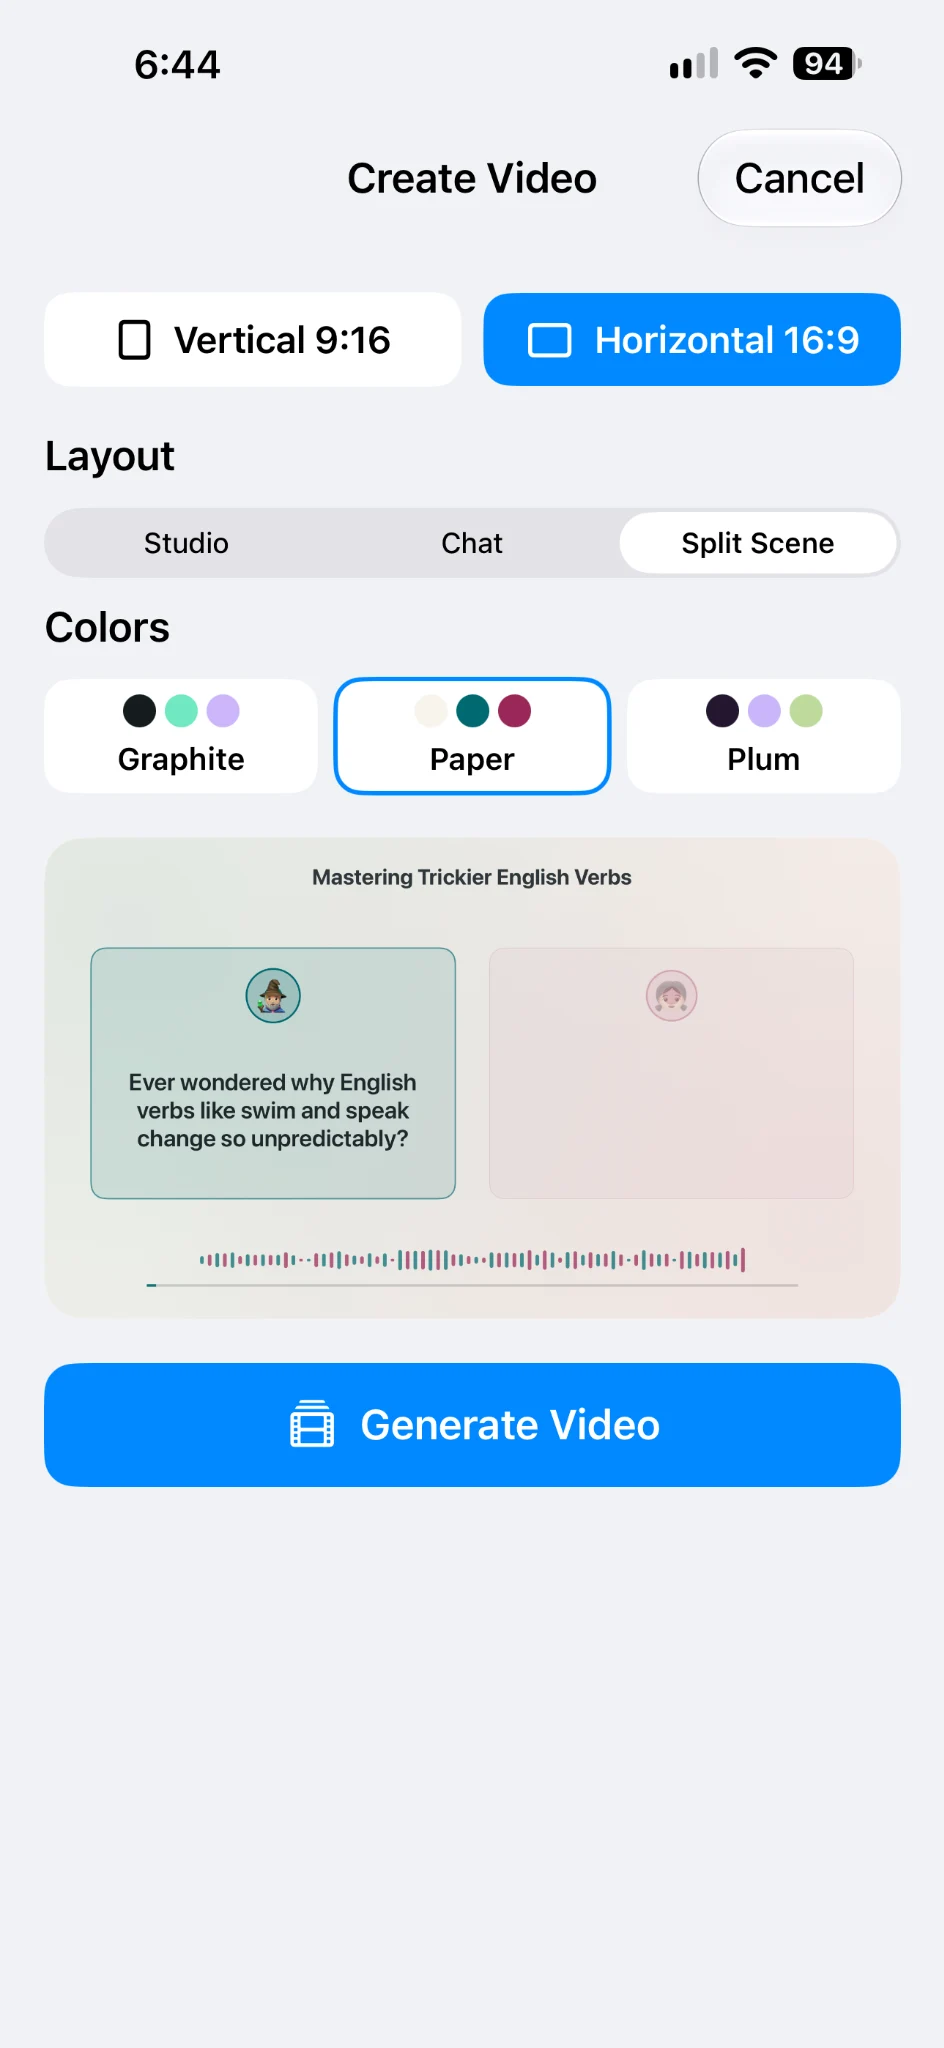
In Split Scene, the frame is divided into two areas. They are stacked in the vertical format and placed side by side in the horizontal format. Each speaker has their own area with a portrait and text.
This is the layout used in the finished example video. When the other character starts speaking, their area becomes brighter. The previous line stays visible in the other speaker’s dimmed area, while the words being spoken are highlighted.
Try this layout for a question-and-answer explanation, a mini-interview or a conversation between characters with different points of view. Viewers can see which speaker each line belongs to.
Choose a color theme
Colors offers three themes:
- Graphite — a dark background with mint and light-purple accents.
- Paper — a light background with teal and pink accents.
- Plum — a dark-purple design with light accents.
The screenshots show the same dialogue in different combinations. You can compare a light or dark presentation before creating the video, then choose one that fits your page or series.
Layout and color theme are separate choices: for example, you can use Split Scene with Paper or Plum. Changing the appearance on the Create Video screen works with the dialogue and audio you have already prepared.
Generate a video from your chosen design
Once you have chosen the format, layout and colors, tap Generate Video.
Our finished example is a vertical video of about 32 seconds, using Split Scene with Plum. It keeps the introduction, the two characters’ lines and the closing line from the original script. As the speaker changes, the active area changes, words are highlighted during speech, and a waveform and progress indicator appear at the bottom.
The screenshots show other previews of the same dialogue. The finished video in this demonstration was generated for one selected combination.
The basic creation and saving workflow is covered in the guide to AI dialogue videos on iPhone.
Which layout should you try first?
For your first video, choose one small topic: a rule to explain, a conversation at a counter or a short scene. Prepare and listen to the dialogue, then compare it in the three layouts.
Start with Studio if the large current line matters most. Try Chat for a story told through messages. Choose Split Scene if you want a separate space for each speaker.
For educational content, check the examples and explanations before publishing. We left the AI dialogue unchanged for this demonstration, but you can refine your own script before generating its audio.
Open Dialogue Studio in Tau34 AI Studio on iPhone, create a short conversation and choose a design that fits your idea.